Call us 24/7+1 (571) 339-9155
FREE DELIVERY on all orders over $20

How to flash EMMC module to boot with Odroid XU4

Flashing and Booting from an EMMC module on an Odroid XU4 can be tricky. This is because you need a bootloader placed on a hidden Partition of the eMMC memory module. When you clean or flash an EMMC module with normal tools like Etcher or Rufus, you might delete the hidden partition that had the bootloader and the XU4 will simply not boot from your image even if the image you flashed is bootable.

While there are recovery images you can download that have the bootloader needed on it, most images you flash after that will still not contain the bootloader and you would be back to square 1.

The best was found to create a properly bootable EMMC is as follows:

  1. If your EMMC module does not boot, its best to first do a recovery process as described on https://wiki.odroid.com/accessory/emmc/recovery_xu4, then see if your EMMC boots to android. You might be able to skip this step 1 but its still recommended. Then go to step 2.
  2. Flash the image your want to boot from on to your EMMC module and see if it boots. if it does then you are set. if not, go to step 3.
  3. Flash the image your want to boot from on BOTH an SD card and your EMMC module.
  4. With the XU4 off and switch set to boot from SD, insert both them flashed EMMC and SD card on your XU4
  5. Turn on your XU4 and let it boot from SD
  6. SSH into the XU4 or get to a terminal window on it and login
  7. At the prompt type: ls /dev/mmc* and hit enter
  8. Your will see all the partitions on both the SD and the EMMC device. Both will start with mmc so don’t get confused by that. Almost always, your EMMC module are the mmc words that have blk0 and blkboot0 in them and your SD card will be the other one, probably the ones that have blk1 or blk2 in the name. In the Batocera environment I was testing, my SD card happens to be the one with blk2 in them. This will be important as it will get used in steps below

What we are going to do now is use the linux dd command to copy the boot partition from your SD card to the appropriate area on the EMMC. Your EMMC device we want to write to is typically mmcblk0boot0 and it will be protected. So we first have to unlock it, then use the dd command as follows:

  1. Type echo 0 > /sys/block/mmcblk0boot0/force_ro and hit enter. This will unlock and give us access to the partition.
  2. Now type dd if=/dev/mmcblk2 of=/dev/mmcblkboot0 bs=512 skip=1 seek=0 count=16381

The last step might take a few seconds or minute. Once you see no more activity, you can now lock the partition again.

  1. Type echo 1 > /sys/block/mmcblk0boot0/force_ro and hit enter.

Now shutdown your XU4 and remove the SD card and flip the switch to boot from your EMMC!

This is what worked for me. Here is a screenshot of my session after step 4 of the first part.

Tutorials and Videos on using iCode adapters for Atari Joysticks, Paddles, Trackballs, and Driving Controllers.

Atari Paddles

Atari Paddle Jitter elimination with Auto and Manual Calibration

See how you can eliminate Paddle Jitter by using the full spectrum of your paddle range on your games. Unlike all other adapters on the market, the iCode duo adapters have auto range calibration plus they give you the ability to you fine tune your device to match your specific paddle range based on the specific game you want to play.

This video walks you through all the calibration settings to help you do this quickly.

Configure Retropie on Stella 2014 Retroarch for Atari Paddles

Learn how to configure your Retropie to work perfectly with Atari Paddles to play paddle games like Breakout and Warlords, with perfect precision!

Windows Configuration for Paddles on iCode Atari USB Adapter using Stella Emulator

Learn how to connect 4 original Atari paddles to your PC running Stella Emulator. You will see all configuration steps needed for 4 Paddles. Video walks through configuration needed to play 4 player Warlords with 4 paddles on your PC.

Atari CX-80 Trackball

Configure iCode Duo plus to connect to an Atari Trackball CX-80 for games like missile command

This video shows you how to configure your iCode Duo Plus USB device to use an Atari Trackball to play Missile Command running Atari 8 bit emulation on your PC or other systems.

MiSTer FPGA configuration

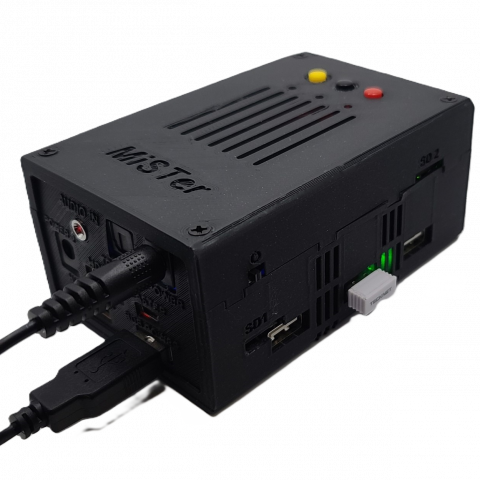
MiSTer FPGA with Atari paddles and joysticks using iCode Plus Adapter

Walkthrough on how to setup your iCode Duo Plus USB Adapter to work flawlessly with MiSTer FPGA. The updated firmware even support 2 player paddles with ease. Let me know if you have any questions and check us out at www.icode.com where you get one.

Atari 5200 Controllers

Atari 5200 Controllers on Mac OS with Analog games like Super Breakout & Missile Command on Emulator

This video shows you how to configure your Mac running Atari 8 bit emulation to work with your Atari 5200 controller using the iCode Duo Plus 5200. The videos shows examples of hot to play Missile Command and Super breakout with precision control!

RetroPie

iCode Wireless Bluetooth adapter with Raspberry Pi 4 and RetroPie

Learn how to connect 2 original Atari joysticks wirelessly to your Raspberry pi 4 running Retropie. You will see all configuration steps needed.

Retropie Configuration for iCode USB Adapters

Walkthrough of how to configure iCode usb adapter with Retropie, Retroarch, Stella, and lr-Stella. Video covers Paddles and Joystick configuration.

Atari Driving Controllers

Configure Atari Driving Controllers on Stella emulator

Learn how to configure your iCode USB adapters for Atari Driving Controllers to play multiplayer games like Atari Indy 500. Video shows how to Connect multiple Atari Driving Controllers to a single USB port.

Post navigation

Analog to Digital conversion with RC circuit in microcontroller projects

How to flash EMMC module to boot with Odroid XU4

Home

New Products

Sale

HIGH PERFORMANCE
COMPONENTS

We only use the highest quality components in all products we manufacture

From Our Blog

PROFESSIONAL SUPPORT

Why should the customer choose us?

Best quality

Best quality is a must at iCode

Shipping

Free for most orders over $20

Support 24/7

Contact us 24 hours a day

Featured Brands

Search for products

Back to Top
Product has been added to your cart